| Included in Version | Release Date |
|---|---|
| V4.3.46.0 |
When viewing the results of a node scan in Cloudhouse Guardian (Guardian), you can access data about specific configuration items that pertain to your selected node. From the results of a node scan, you can view configuration items like ipaddress, which simply shows the IP address for the node, and os_distro_version, which shows the current version of the operating system (OS) being run on the node.
In the case of configuration items like os_distro_version, it can be useful to view End of Life data to see the date when a node's OS will expire. Similarly, End of Life data can be useful for the openssl configuration item because it can alert you to when an update is needed. You can find End of Life data for these configuration items directly in Guardian, and you can also include these configuration items in policies so you're automatically alerted to any approaching dates.
Note: End of Life data is only available for certain configuration items. You'll only see this data where relevant, like for os_distro_version and known package versions, which have built-in expiration dates for Guardian to capture.
View End of Life Data
End of Life data is available for select configuration items directly from the results of a node scan. You'll see this data where relevant, like when viewing a node's OS version.
To view end of life data, complete the following:
-
From the Monitored tab (Inventory > Monitored), select a node to view its scan results.
-
Find or search for the configuration item you want to view. For example,
openssl. Then, click the item to view more details.
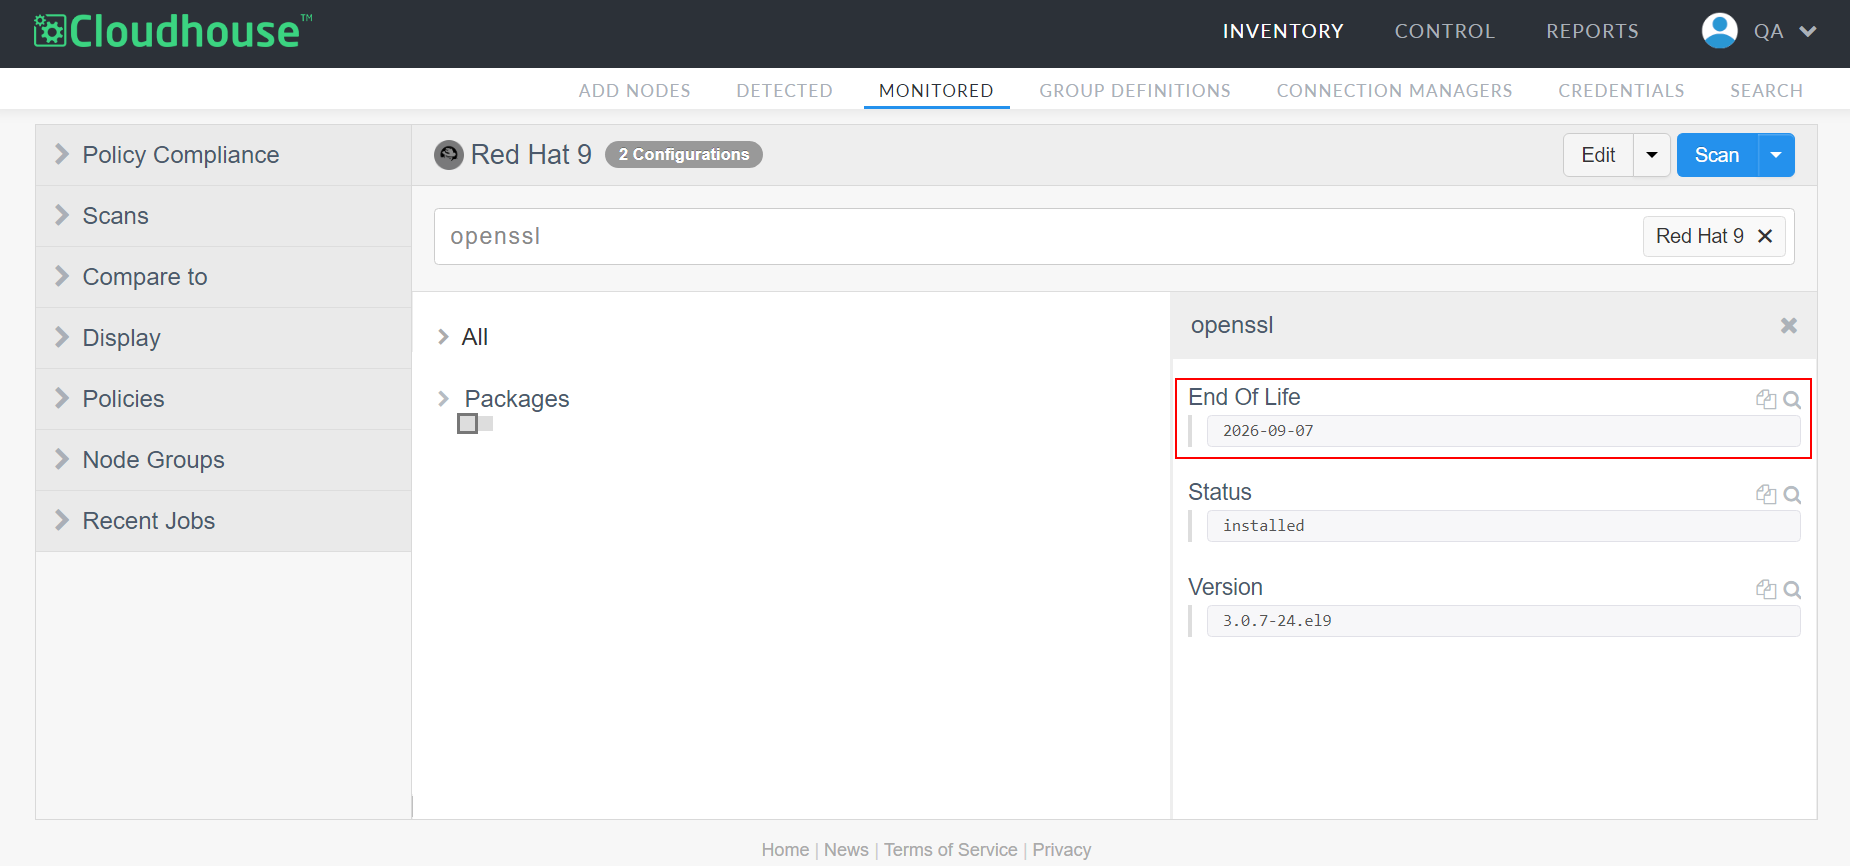
In the side panel, you'll see End Of Life along with the associated value. In the image below, you can see that the version of OpenSSL running on the selected node is set to expire on 2032-05-31.
Create an End of Life Policy
While viewing End of Life data on a node-by-node basis can be useful, you can let Guardian do the work of monitoring this data for you by creating a policy to alert you when a date is approaching. For example, you can create a policy that checks End of Life data for all configuration items under the Packages category. You can designate that, for a node to pass this policy, End of Life data must always be more than three months from now. If a date is sooner than three months from now, it fails the policy, alerting you that the item requires your attention.
Tip: For more information on policies, see Policies
To create an End of Life policy, complete the following:
-
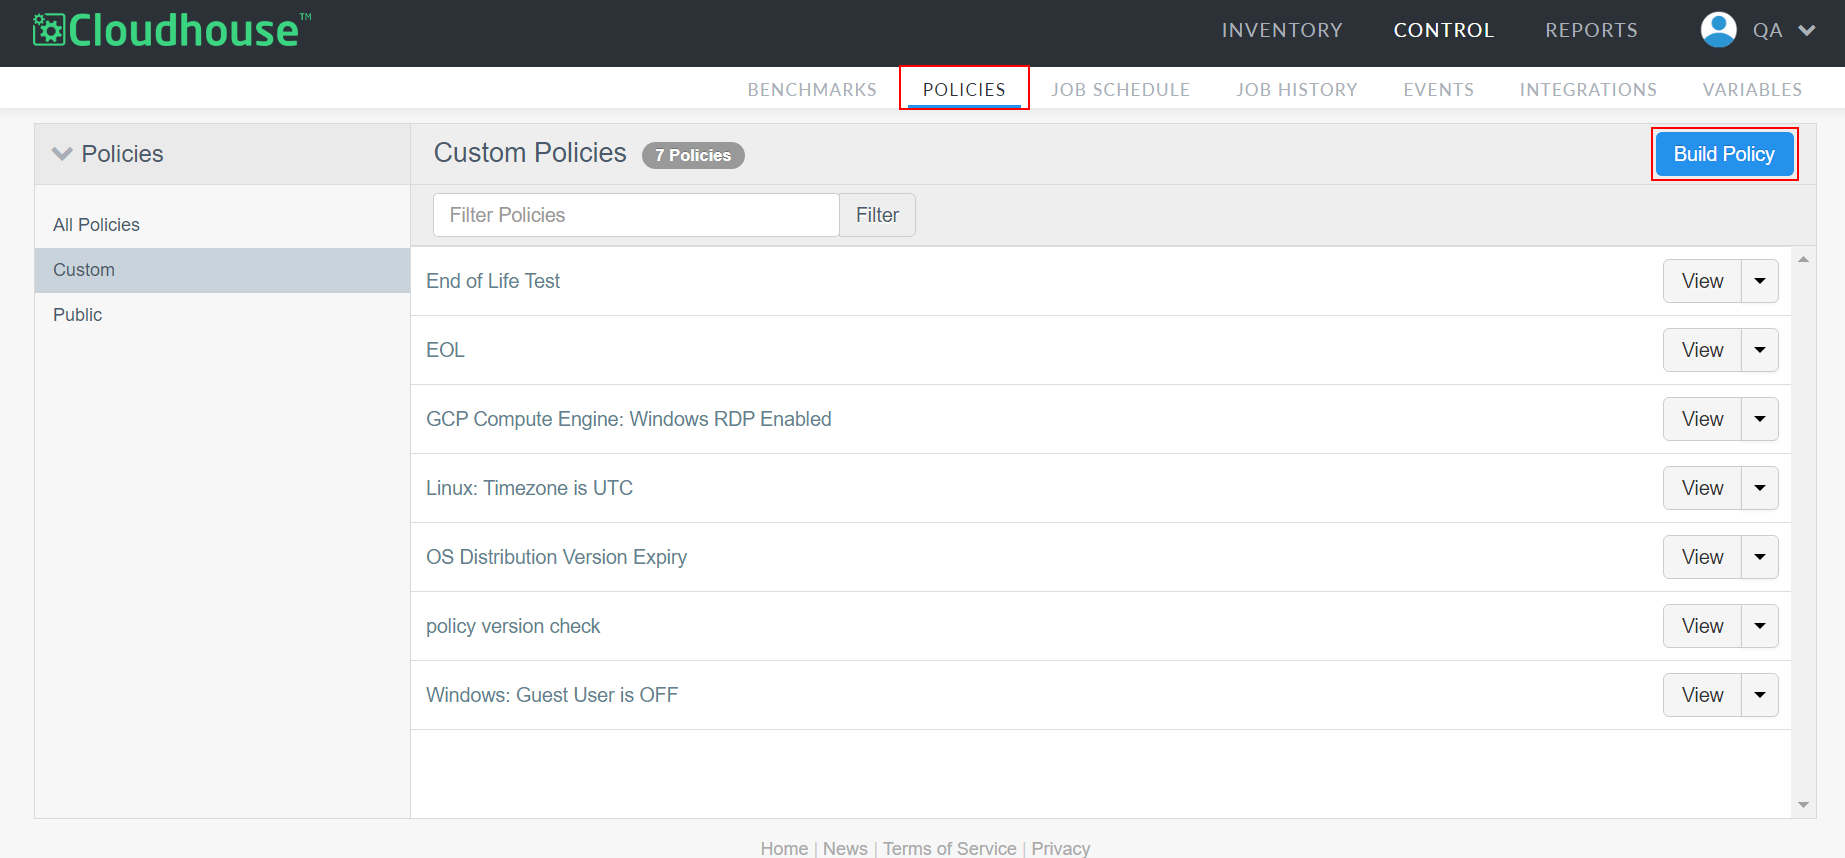
From the Policies tab (Control > Policies), click Build Policy.
-
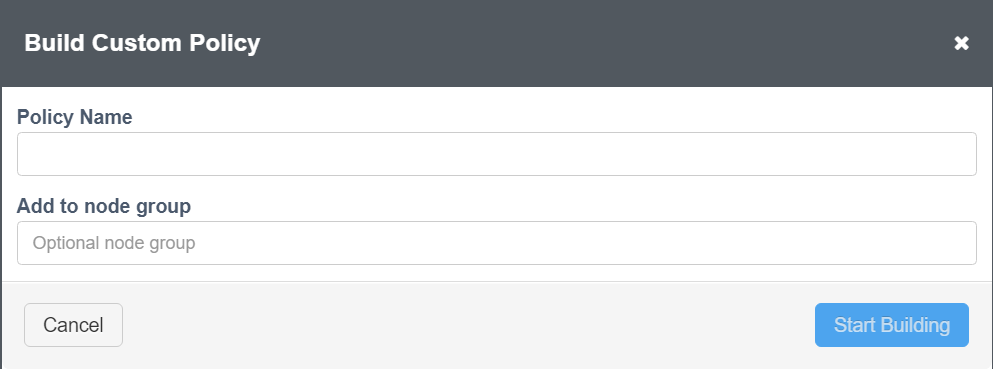
Enter a Policy Name and a node group to apply the policy to. Then, click Start Building.
Note: If you don't apply the policy to a node group here, you can do it from within the policy later.
-
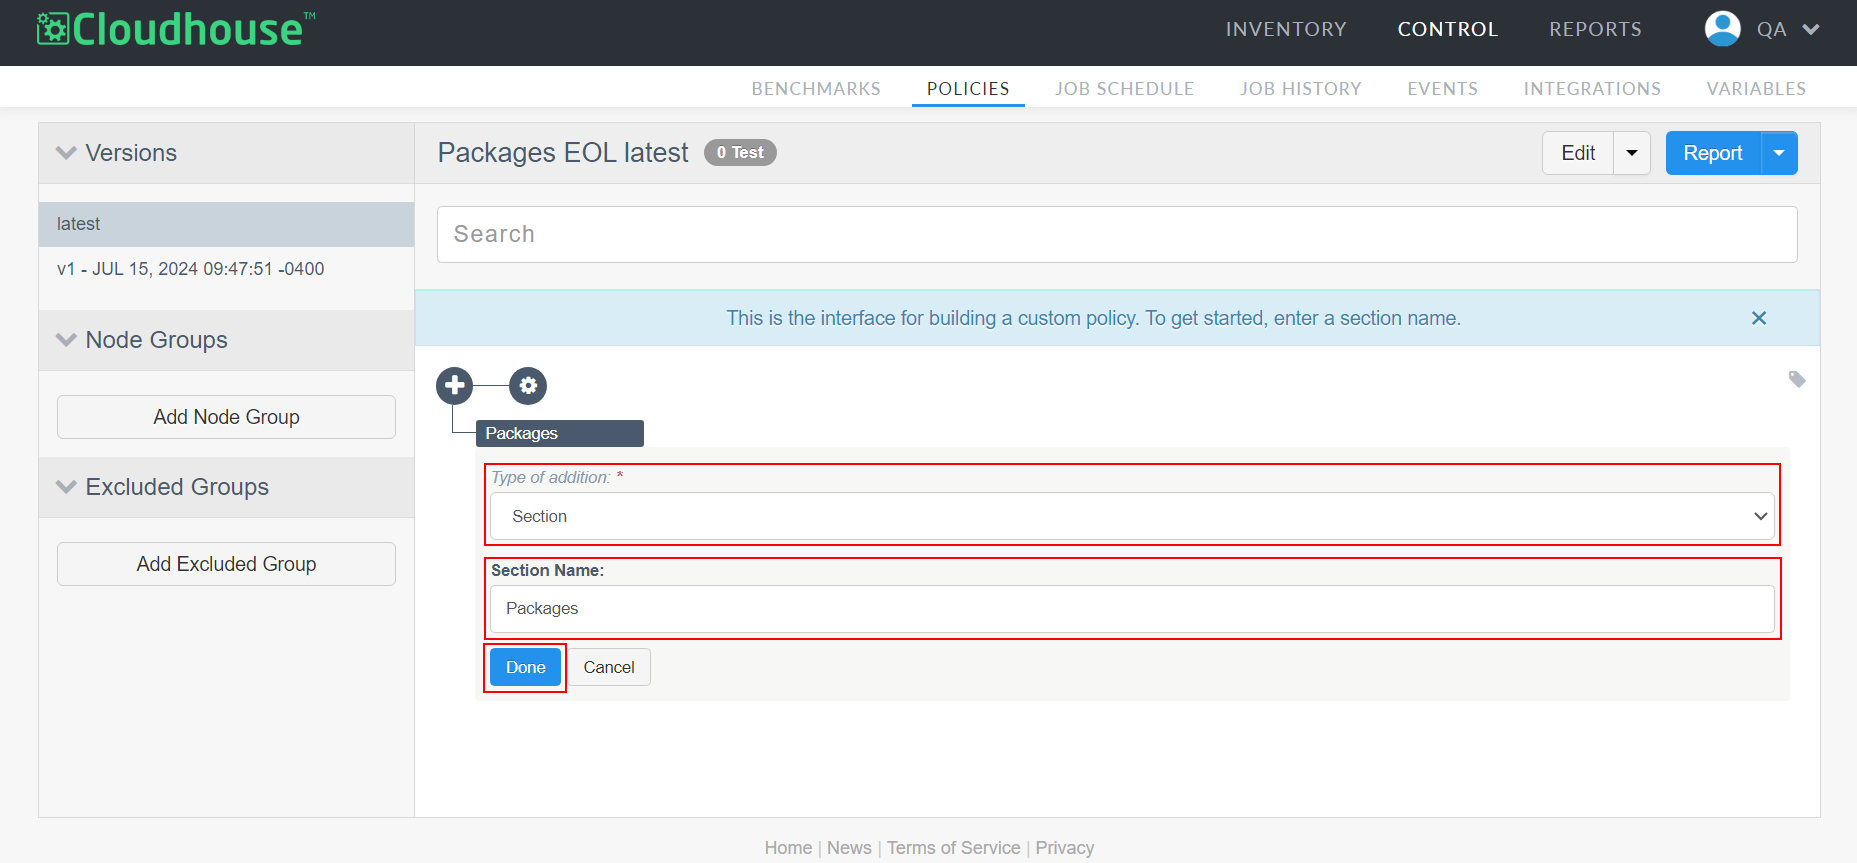
Select 'Section' from the Type of Addition drop-down and enter 'Packages' as the Section Name. Then, click Done.
Note: While certain packages do contain End of Life data, other configuration items do too. For example,
os_distro_versionunder Inventory contains End of Life data. To monitor this configuration item's End of Life data, create a separate check for 'Inventory' using the same configuration as outlined below. -
Under the new Packages section, click the Add Section icon (
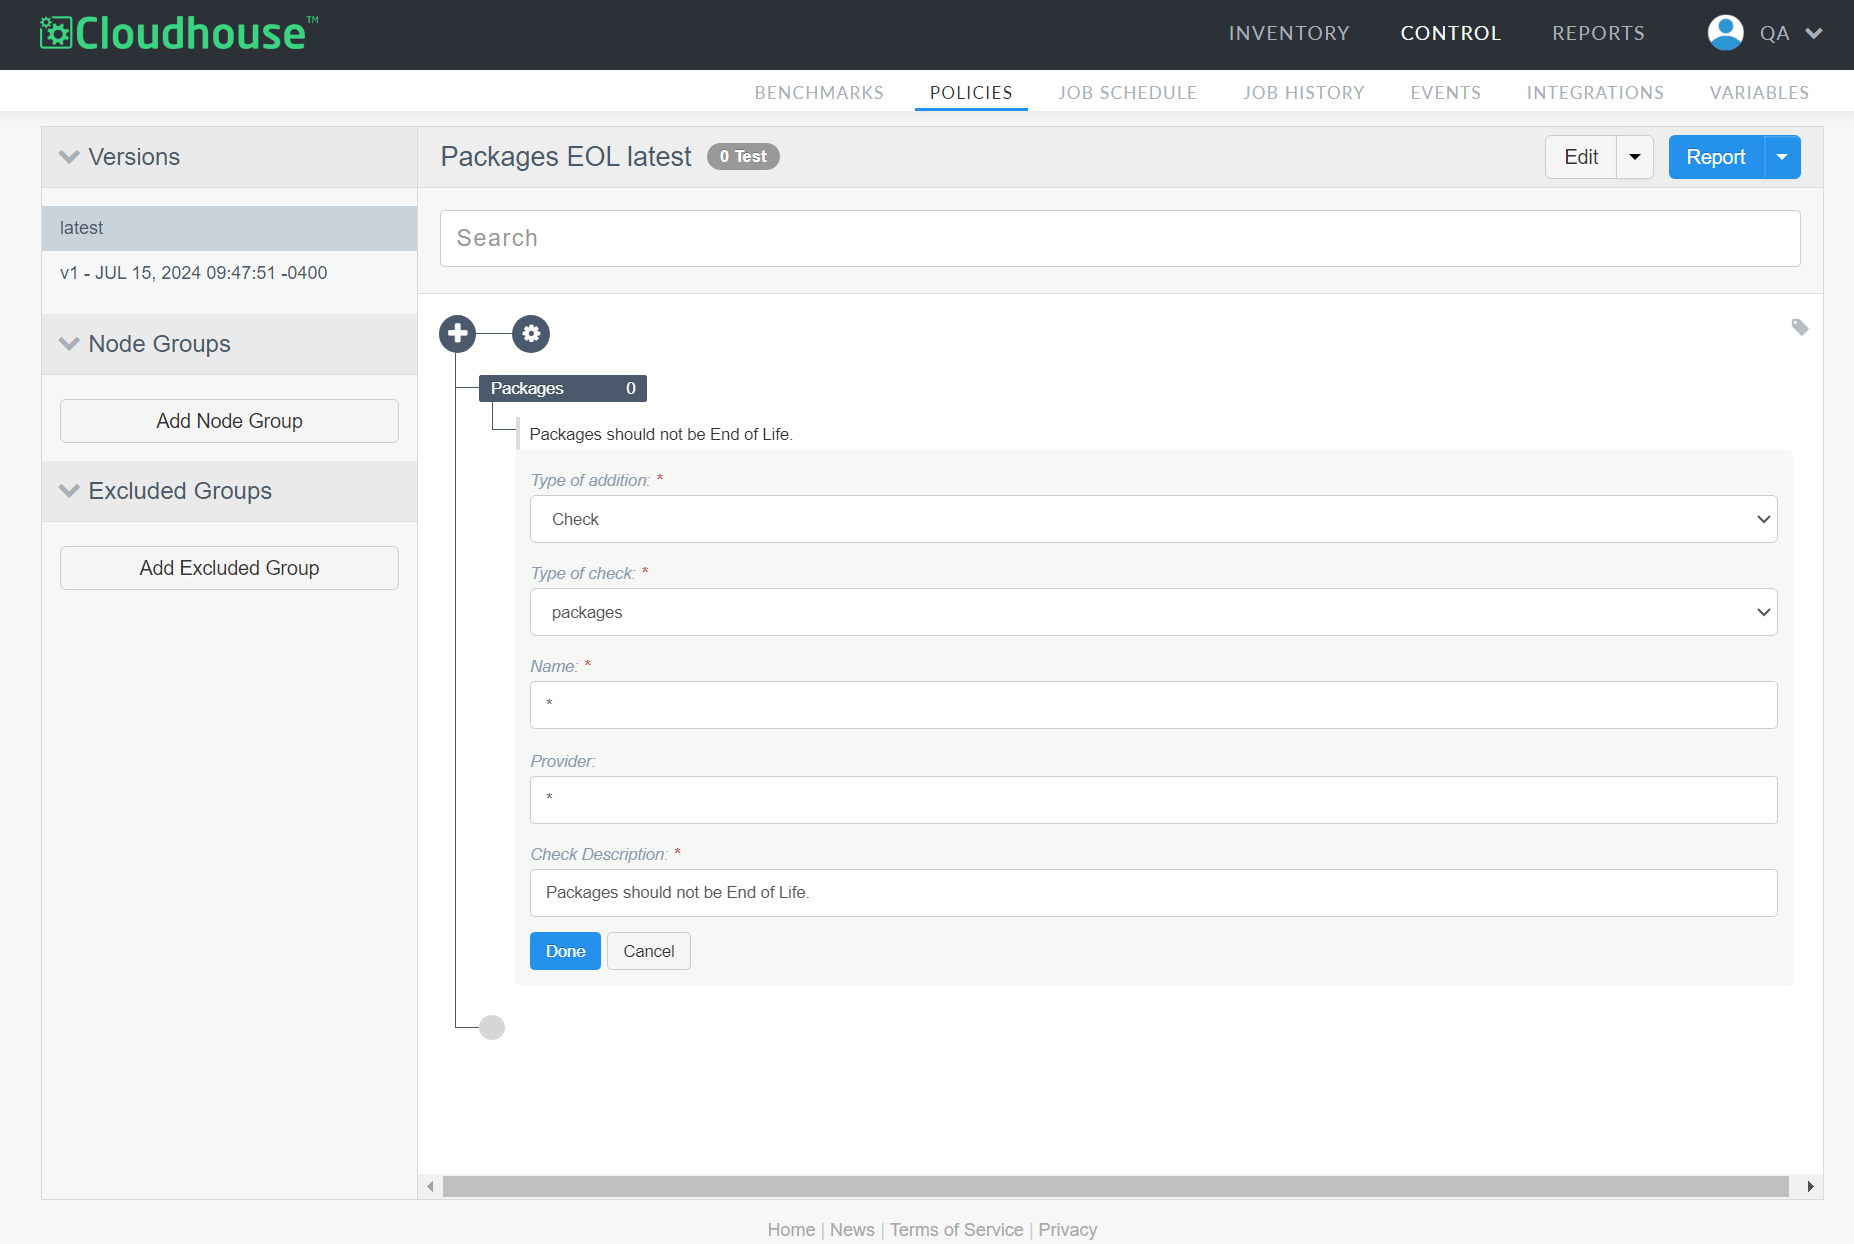
 ) and select 'Check' from the Type of Addition drop-down. Then, select 'packages' from the Type of Check drop-down.
 -
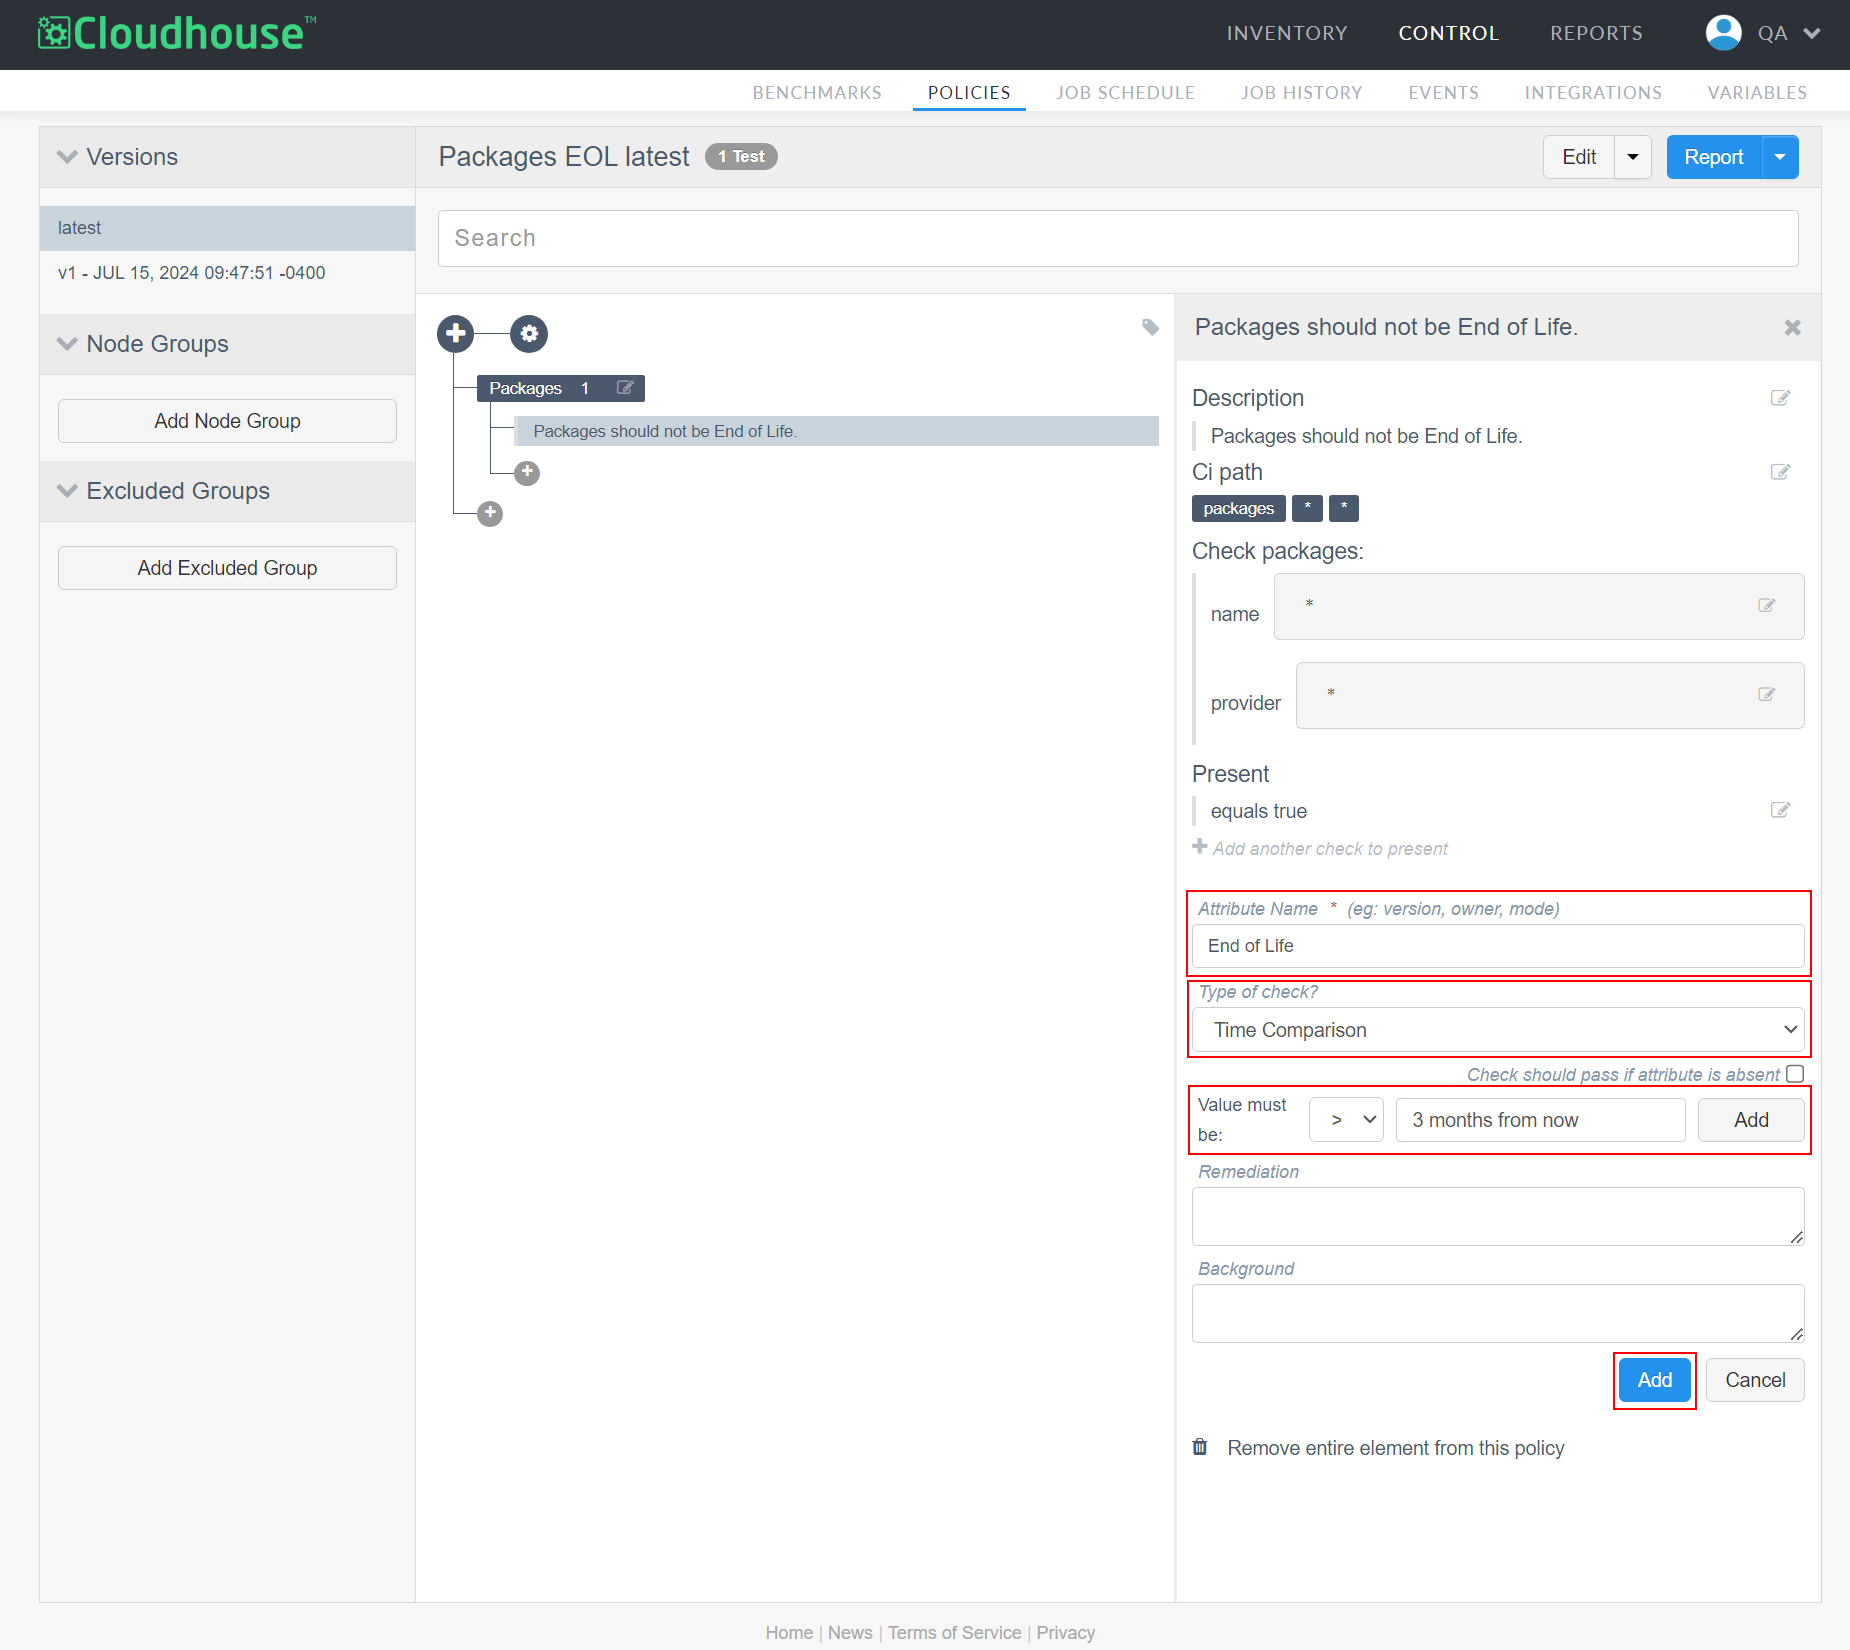
Enter '*' as the Name, '*' as the Provider, and 'Packages should not be End of Life' as the Check Description. The '*' entries serve as wildcards, telling Guardian to check every configuration item contained within the Packages category.
-
In the sidebar, click Add Attribute Check. Then enter 'End of Life' as the Attribute Name and select 'Time Comparison' as the Type of Check.
-
Select '>' from the Value must be: drop-down and enter '3 months from now' in the Value must be: field. Then, click Add to add the Time Comparison check to the overall Attribute Check.
-
Click Add again to add the attribute check to the policy.
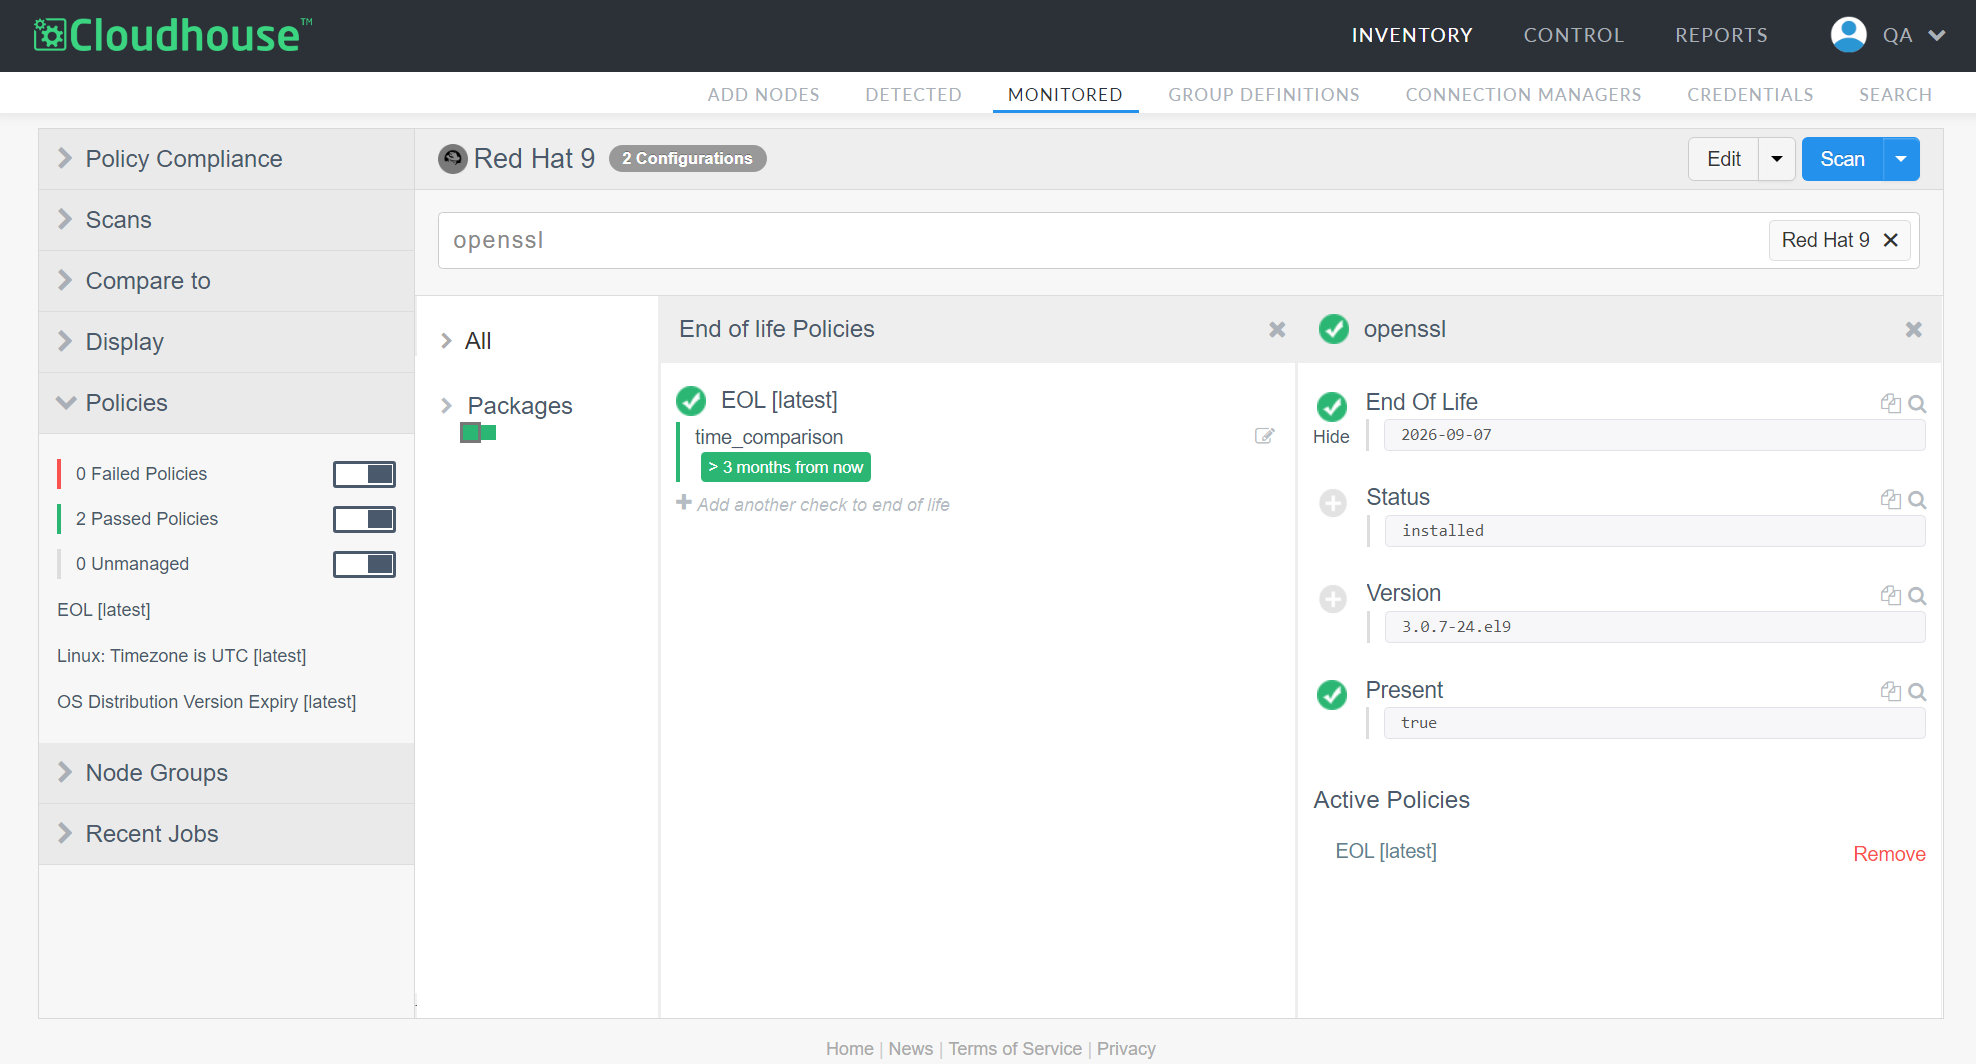
Now, you have a policy that checks End of Life data for all node packages to ensure their dates are more than three months from now. To verify the policy is working, view the node scan results for a node within the node group you applied the policy to. Then, find a package that contains End of Life data (openssl, for example). If your policy is functioning properly, you'll see the results in the sidebar:
If your policy doesn't appear to be working, ensure that you've applied it to a node group. Also, keep in mind that not every package has End of Life data, so you'll only see it where applicable. You may also wish to create additional policies to monitor End of Life data for other configuration items that don't fall under the Packages category. You can do so following the above process, simply replacing 'Packages' with the desired category.
